 Save to Pinterest
 My friend texted me a photo of her daughter's graduation cap mid-toss, and I knew exactly what I wanted to bake. There's something about a galaxy cake that feels like the perfect way to celebrate reaching for the stars—literally. I'd seen these cosmic creations online but never attempted one, so I gathered my food coloring and offset spatula like I was preparing for an art project, because honestly, that's what this is. The buttercream swirls and hand-painted stars turned out messier than I expected, but somehow more beautiful because of it.
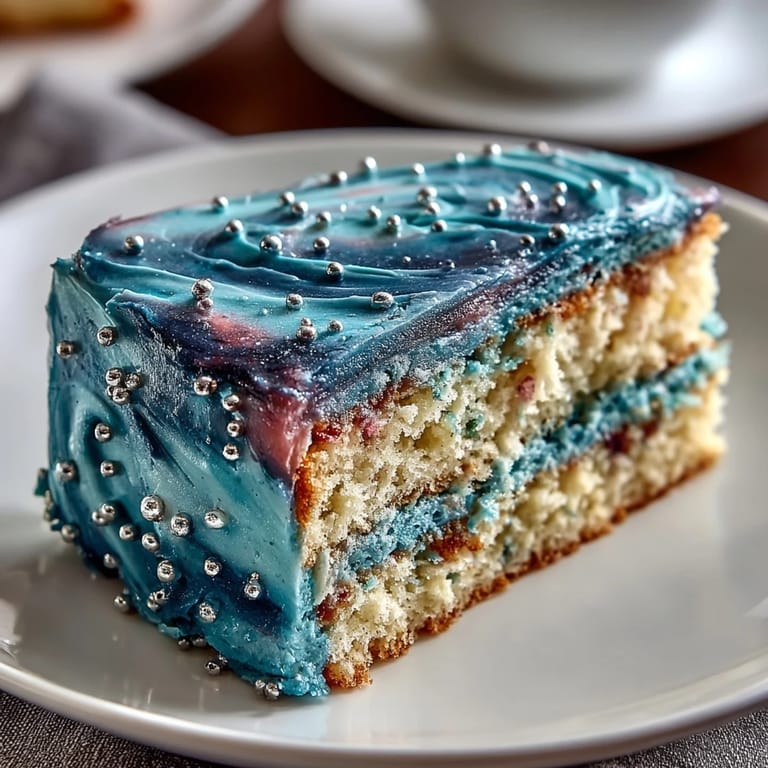
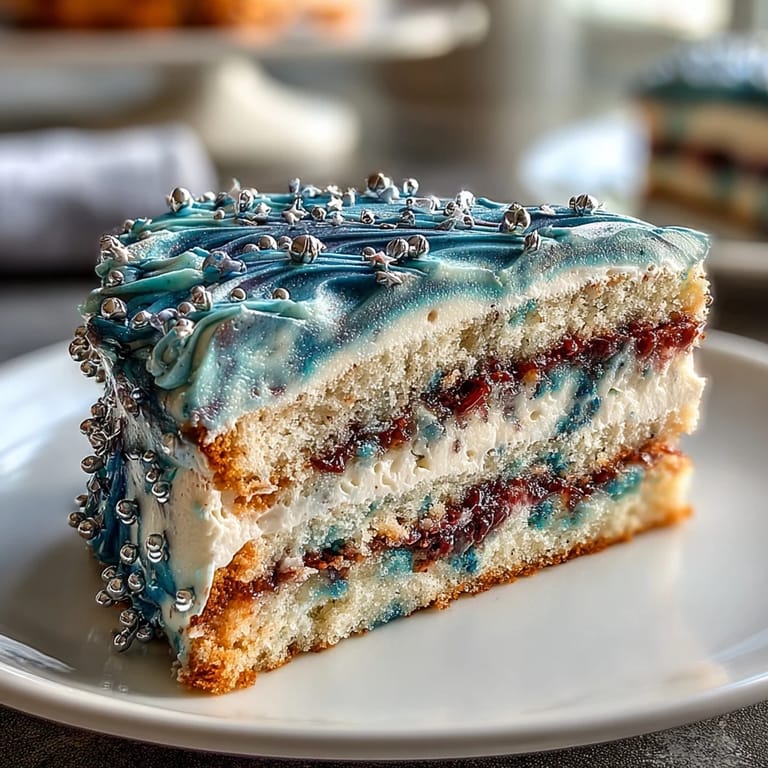
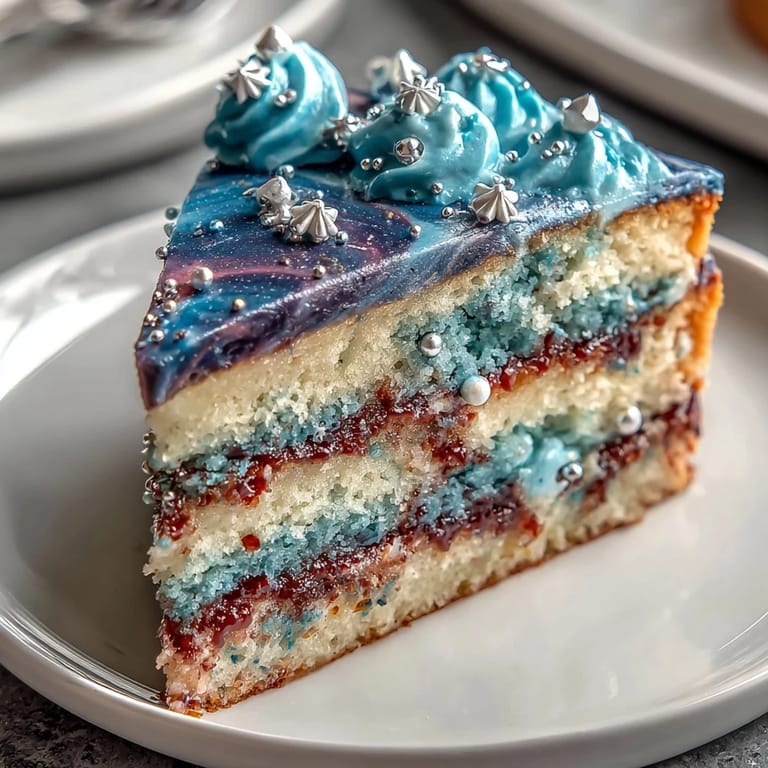
When I brought this cake to the celebration, someone gasped—actually gasped. The three layers stacked high, swirled with purples and teals and deep blacks, catching the light with edible glitter, suddenly made the whole afternoon feel special. Watching people cut into those cosmic layers and find that tender vanilla cake inside felt like sharing something small but meaningful. That's when I realized celebrations don't always need perfection; they need heart.
Ingredients
- All-purpose flour (2 ½ cups): The foundation of a tender crumb—measure by spooning and leveling, not scooping straight from the bag, which can pack the flour and make your cake dense.
- Granulated sugar (2 cups): Creaming this with butter creates air pockets that give the cake its signature fluffy texture and light structure.
- Unsalted butter (1 cup for cake, 1 ½ cups for frosting): Room temperature is essential—cold butter won't cream properly and warm butter creates a greasy batter, so pull it out about an hour ahead.
- Eggs (4 large): Room temperature eggs blend more smoothly into the batter and incorporate more air, which means a taller, more tender cake.
- Whole milk (1 cup for cake, ¼ cup for frosting): Room temperature milk won't shock the batter and will combine more evenly into the mixture.
- Baking powder (2 ½ tsp): This is your leavening agent, so make sure your baking powder is fresh—old powder loses its lift.
- Vanilla extract (1 tbsp for cake, 2 tsp for frosting): Real vanilla makes a noticeable difference in flavor depth, though pure or imitation both work.
- Powdered sugar (5 cups): Sift this before measuring to avoid lumps that can create a grainy buttercream texture.
- Gel food coloring (black, navy blue, purple, pink, teal): Gel colors are concentrated and won't thin out your buttercream the way liquid coloring does—use sparingly and build the shade gradually.
- Edible gold and silver star sprinkles: These catch light beautifully and add that final touch of celebration without requiring steady hands.
- Edible glitter or luster dust: Apply this after the buttercream is set so it stays put and maintains its shimmer throughout the party.
Tired of Takeout? 🥡
Get 10 meals you can make faster than delivery arrives. Seriously.
One email. No spam. Unsubscribe anytime.
Instructions
- Prepare your workspace:
- Preheat the oven to 350°F and grease three 8-inch round pans, lining the bottoms with parchment paper so your cakes slide out cleanly. Having everything measured and ready—a practice bakers call mise en place—makes the whole process feel less overwhelming.
- Cream the butter and sugar:
- Beat them together for 2 to 3 minutes until the mixture looks pale and fluffy, like mousse. This is where the magic starts—you're incorporating air that will make your cake light.
- Add eggs one at a time:
- After each egg, beat well before adding the next one, which helps emulsify the batter and prevents a curdled appearance. Then stir in the vanilla extract.
- Combine dry and wet ingredients:
- Whisk flour, baking powder, and salt together in a separate bowl. Add the dry mixture to the wet mixture in three additions, alternating with the milk and starting and ending with flour—this method keeps the batter from becoming tough.
- Divide and bake:
- Pour batter evenly into the pans (an ice cream scoop helps distribute it fairly) and bake for 30 to 35 minutes until a toothpick comes out clean. The cakes will smell buttery and vanilla-sweet when they're done.
- Cool with patience:
- Let them cool in the pans for 10 minutes—this lets them set enough to handle—then turn them out onto wire racks to cool completely. Never frost a warm cake or it'll melt.
- Make the galaxy buttercream:
- Beat softened butter until creamy, then gradually add sifted powdered sugar, milk, and vanilla, beating until light and fluffy. The whole process takes about 5 minutes and transforms into a dreamy frosting.
- Tint your galaxy colors:
- Divide buttercream into bowls and add gel food coloring drop by drop, stirring until you reach rich cosmic shades. Less is more with gel colors—you can always add more, but you can't take it out.
- Create the marbled buttercream log:
- Place random spoonfuls of each color on plastic wrap, roll it up into a log shape, twist the ends, and snip one end to fit into a piping bag with a large round tip. This clever trick creates the galaxy effect without hours of piping practice.
- Layer and crumb coat:
- Place one cake layer on your serving plate, spread a thin layer of galaxy buttercream, and repeat with the remaining layers. Once assembled, apply a thin crumb coat over the entire cake and chill for 20 minutes so the next layer sticks without dragging up crumbs.
- Pipe the galaxy:
- Using the marbled buttercream log in the piping bag, pipe and swirl the frosting all over the cake with an offset spatula, creating gentle waves and swirls. Don't overthink it—the beauty is in the organic, unpredictable marble pattern.
- Paint your stars:
- Mix white gel food coloring with a tiny bit of water and use a food-safe paintbrush or splatter tool to flick small stars and specks across the galaxy. Hold the brush a few inches from the cake and flick gently for a natural scattered effect.
- Add the final sparkle:
- Sprinkle edible gold and silver stars and a pinch of edible glitter or luster dust over the cake for shimmer and dimension. A graduation cap topper on top makes the celebration theme complete.
 Save to Pinterest
 Standing in my kitchen at midnight the night before the party, piping those final stars onto the cake, I felt something settle. This wasn't just a dessert—it was a celebration taking shape under my hands, a way of saying to someone important: we see your accomplishment, and we wanted to make something beautiful to mark this moment. That's the real magic of a galaxy cake.
The Science of Cake Layering
Three layers might seem ambitious, but it's actually where this cake shines. The extra height creates visual drama, and the cake layers are thick enough that they won't slide around on the buttercream. Each layer gets its own cushion of frosting, which means every slice contains that beautiful combination of tender cake and creamy frosting. I learned this by making a two-layer version first, which looked a bit deflated compared to this towering version.
Working with Gel Food Coloring
Gel coloring is thicker and more concentrated than liquid food coloring, which makes it perfect for buttercream because it won't thin out the texture. The colors are also more vibrant—your galaxy actually looks deep and cosmic rather than pastel and weak. I made the mistake once of using liquid coloring and ended up with what looked more like a tie-dye cake than a galaxy, so gel is genuinely worth the small investment. Start with a toothpick's worth and build the color gradually, stirring well after each addition.
Timing Your Cake Assembly
You can bake the cake layers up to two days ahead and store them wrapped in plastic wrap at room temperature, which takes pressure off the day of decorating. The buttercream keeps for three days in the fridge, and the fully decorated cake can sit unrefrigerated for up to 8 hours before serving. If you're working ahead, assemble the cake with its crumb coat the day before, chill it overnight, and add your final galaxy swirls and stars on the morning of the celebration.
- Bake early, chill overnight, decorate the morning of—this spreads the work and keeps you from a last-minute panic.
- Keep the marbled buttercream log in a piping bag in the fridge between uses so it stays firm and pipes smoothly.
- If edible glitter starts to dull, add it right before serving rather than hours ahead, so it catches light beautifully.
 Save to Pinterest
 This galaxy cake has become my go-to celebration dessert for anyone reaching a milestone. There's something perfect about a dessert that tastes as good as it looks, that makes people feel like they're worth the effort.
Recipe FAQs
- → How is the galaxy effect achieved in the buttercream?
Multiple colors of tinted gel buttercream are combined by rolling different shades together into a log, then piped and spread to create a marbled galaxy pattern.
- → What types of edible stars are used for decoration?
Edible gold and silver star sprinkles, along with edible glitter or luster dust, are applied to enhance the cosmic theme with shimmering accents.
- → Can this cake be flavored beyond vanilla?
Yes, adding layers of raspberry or blueberry jam between the cake layers introduces a fruity dimension to complement the vanilla base.
- → What tools are essential for decorating this cake?
Key tools include piping bags with round tips, an offset spatula for spreading, and a food-safe paintbrush or splatter tool for applying star details.
- → Is this cake suitable for vegetarians?
Yes, the ingredients used align with a vegetarian diet, containing no meat or gelatin products.